KorGE Tutorial - Writing 2048 game. Step 0 - Introduction
KorGE is an open source multiplatform game engine written
in Kotlin. You can use it to develop your own games of various genres targeting JVM, Web,
Android and iOS.
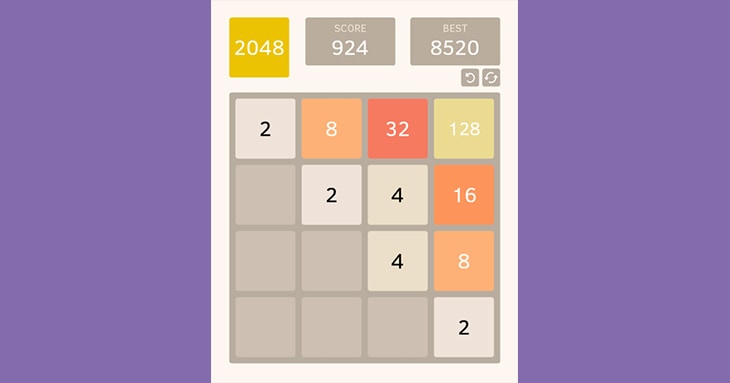
In this tutorial I will guide you through the steps of writing a 2048 game using KorGE and Kotlin. You can check the
resulting game here. The source code is on GitHub.

This tutorial will have several parts - steps. In them, we will discuss the following features of KorGE:
- Views and graphics
- Text and images
- Positioning
- Mouse and keyboard events
- Animation
- Native Storage
- and more!
Well, let's get started!
Note: you need to install Java JDK before starting.
Creating new project
First, we need to create a new project for our game. There are two ways to do it:
1. Using KorGE Forge
KorGE provides a game engine (slightly changed IntelliJ community), that allows you to create KorGE projects. You can read more about installing it here. Then click on create new project and choose the korge-hello-world starter template and give it a name!
2. Downloading/cloning project template
You can clone the template project from GitHub or
download it directly.
Once we have a new project, we need to configure it for the game.
Game configuration
In the new project you will have the build.gradle.kts file that looks like this:
import korlibs.korge.gradle.*

plugins {
	alias(libs.plugins.korge)
}
...
The korge block is the place where you can specify some information about the game. For example, let's write id and name of the game:
korge {
	id = "com.example.game2048"
	name = "2048"
	targetDefault()
}
Note: you can read the full configuration description here.
Now let's go to the main function that is executed when the game is launched. It locates at src/main.kt. It should look like this:
...

class MyScene : Scene() {
	override suspend fun SContainer.sceneMain() {
		val minDegrees = (-16).degrees
		val maxDegrees = (+16).degrees

		val image = image(resourcesVfs["korge.png"].readBitmap()) {
			rotation = maxDegrees
			anchor(.5, .5)
			scale(0.8)
			position(256, 256)
		}

		while (true) {
			image.tween(image::rotation[minDegrees], time = 1.seconds, easing = Easing.EASE_IN_OUT)
			image.tween(image::rotation[maxDegrees], time = 1.seconds, easing = Easing.EASE_IN_OUT)
		}
	}
}
It's a template code. You can launch the project (the section below) and see what it does. The important part here is the Korge(...) call. It lets you specify the stage's size, background color and some other elements.
Let's define width, height, title and background color of our game. Also let's remove all unnecessary stuff inside sceneMain():
suspend fun main(): Unit = Korge(
    title = "2048",
    backgroundColor = RGBA(253, 247, 240),
    windowSize = Size(
        width = 480,
        height = 640,
    ),
    //gameId is associated with the location of storage, which contains `history` and `best`
    gameId = "com.example.game2048",
) {
    val sceneContainer = sceneContainer()

    sceneContainer.changeTo { MyScene() }
}

class MyScene : Scene() {
	override suspend fun SContainer.sceneMain() {
		// TODO: We will write all of our code here!
	}
}
Note: There are several ways how you can define a color in korge. One of them is by specifying Int/Float/HexInt values for red, green, blue and alpha (optional) in RGBA. The other one is by specifying hex string for the whole color via Colors["#......"]. The another one - by using color name with Colors. **prefix. So the four options below are equivalent:
RGBA(0x00, 0x00, 0xFF, 0xFF)RGBA(0, 0, 255)Colors["#0000FF"]Colors.BLUE
After the previous changes let's launch our game and see that everything works correctly.
Game launch
Since KorGE supports several platforms, you can launch your game on any of them. There are official guides about game launch on Desktop (JVM) , Web (JS) , Android and iOS. I prefer to use JVM because it's the simplest and fastest way of testing a KorGE project.In order to launch your game on JVM, you should write this line in terminal:
./gradlew runJvm
To simplify game launch, I suggest you use KorGE Forge's interface for running configurations. There is a special drop-down element at the top of Forge's window:

launch your game by clicking the green triangle button at the top of KorGE Forge.
At this moment, when launching the game, we'll see just a beige window with the specified size and title:

In the next part of the tutorial, we'll know how to use graphics and text views and how to position them. We'll add a logo, score views and a background for our game. Stay tuned!